Green Slabs

Click to display topo
Green Slabs is an area with a short approach and many easy to moderate gear climbs. It is located relatively low on the mountain at 5600', so it typically sees more climbers in the cooler months than in the summer. To get to Green Slabs, follow the directions given in "Squeezing the lemmon II..." by Eric Fazio-Rhicard or "A Falcon Guide: Rock Climbing Arizona" by Stewart M. Green.
The development of the Green Slabs web-page marks a turning point in the way I cover climbing areas and routes. Currently, ClimbAZ.com is hosted by a web-server and a monthly fee is paid. The amount of storage has continually increased since ClimbAZ.com was started and currently I have 250 MBytes available. The average size of a JPEG photo that I typically use on the web-site is 33 KBytes. This means that I can store approximately 7575 photos before I use up the storage that is currently available. Based on counting climbs in the index of "Squeezing the lemmon II..." by Eric Fazio-Rhicard, I estimate that there about 1700 climbs on Mt. Lemmon. This means I have enough storage to show four photos of every rock climb on Mt. Lemmon. Welcome to the future!
Here is something even more scary... The amount of storage on the website has grown by 2.5 times in the year and a half that I have run the web-site. If this growth rate continues for the next ten years, I will have enough storage to use 512 photos to describe each Mt. Lemmon climb (Note: if 512 3.5x5" photos are stacked on top of each other, they would be 150' tall - taller than most climbs.)
[The above discussion was written in September, 2002. In January, 2003 the amount of storage doubled to 500 Mbytes. This means I have enough storage to show eight photos of every rock climb on Mt. Lemmon. June, 2003 - 650 MBytes. February 2006 - 12 Gbytes: 214 photos of every climb!]
I have tried to present a wide range of photos of most of the Green Slabs climbs. Side views, top views, left and right views, anchors, bolts, etc. Even with the plethora of photos, I still only averaged a little over three photos per climb. I guess I will have to work harder to find things to photograph.
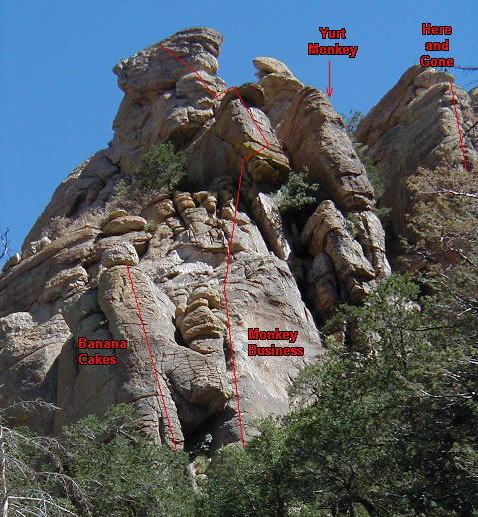
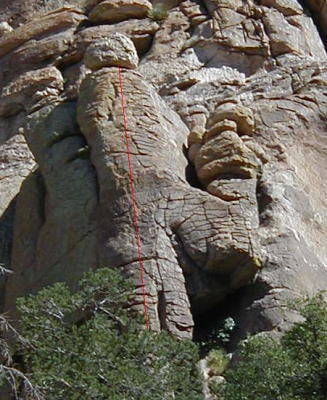
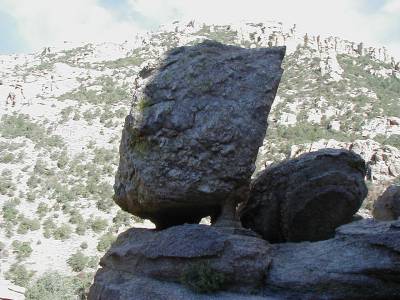
Banana Cake is an all gear climb - there are no anchors at the top. There is a large block standing on a small pedestal that can be used to set up a belay and the chain anchors at the top of the first pitch of Monkey Business can be used to rappel off the climb. Note that the protection on Banana Cake is a little thin at the bottom.
|
Front view of Banana Cake. |
|
Side view of Banana Cake. |
|
Side view of block at the top of Banana Cake. |
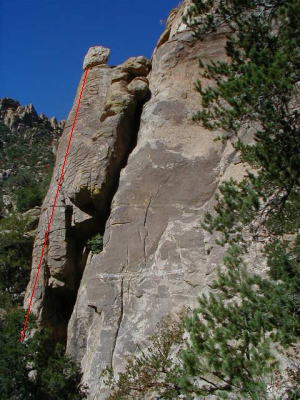
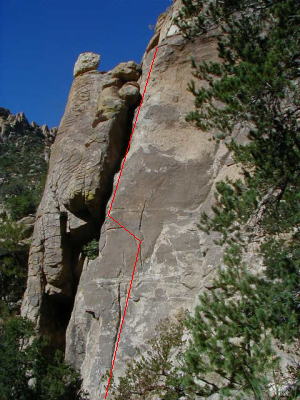
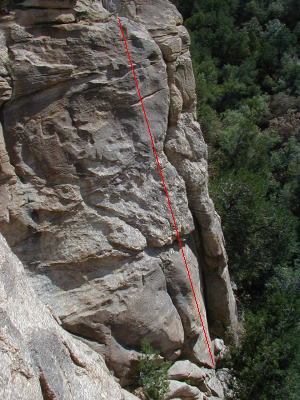
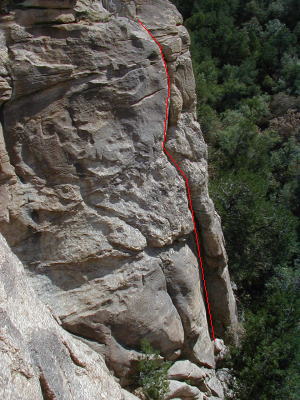
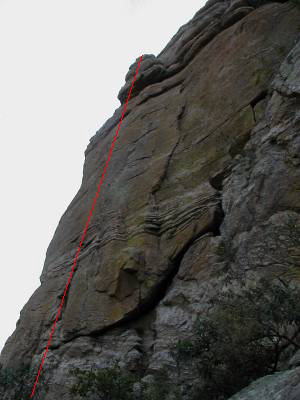
In both the guidebooks, Monkey Business is described as a single pitch climb. Although it is a fun climb as a single pitch climb, it has two additional pitches (a topo of the three pitches can be displayed by clicking on the photo above). The first pitch of Monkey Business has a single 3/8" bolt with a Fixe bolt hanger marked with three dots. There are two chain anchors on the first pitch, each with seven links attached to quick-links and cold-shuts. The anchors are easy to see from the bottom of the climb.
| Bolt Number | Bolt Height | Run-out |
| 1 | 38' 5" | 38' 5" |
| Anchors | 54' 0" | 15' 7" |
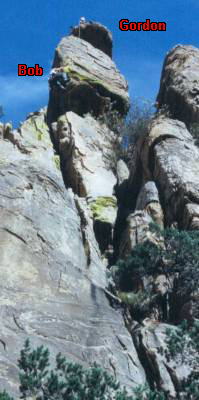
The second pitch can be climbed up and to the right of the chain anchors. A "committing" but relatively straight-forward move is made onto the face of an overhanging block. The face of the block is climbed and a good belay stance can be found at the top of the block.
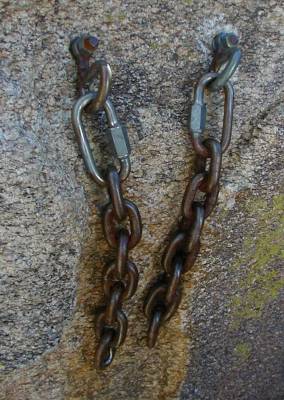
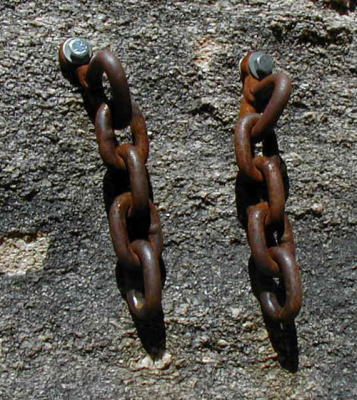
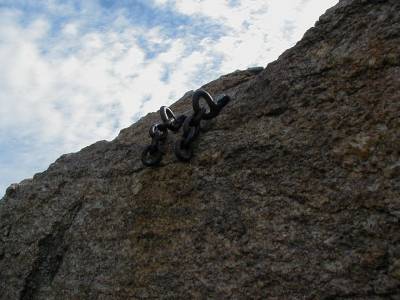
Third pitch starts out fairly easy, working up towards the face of the large block at the top of the climb. Climb the face of the block to the chain anchors at the top of the climb. There is a 3/8" bolt with a Metolius bolt hanger on the face of the block and a set of chain anchors at the top. There are nine links attached to quick-links and cold-shuts on each of the chain anchors (see photo below).
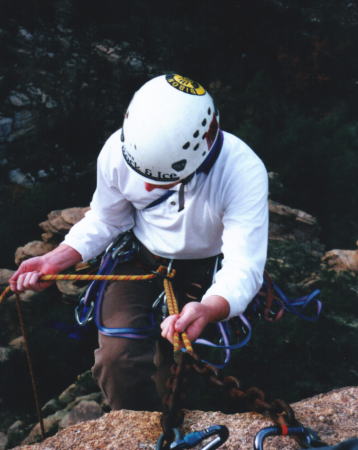
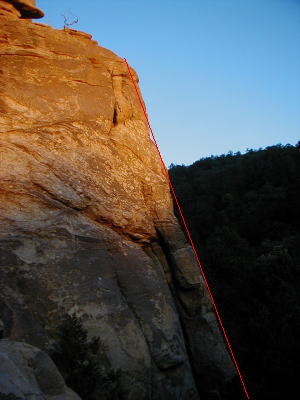
The rappel off the top is kind of ugly. It starts off nice and vertical, but after about fifty feet, you come to a flat area. Here you walk backward on-rappel through the loose rock and bushes, eventually heading downward towards the chain anchors at the top of the first pitch. Rappeling with a doubled sixty meter rope will get you about 10 feet short of these anchors so you will have to get off the rope and downclimb to the chain anchors (be careful you don't rappel off the end of the rope). Pull the rope, thread it through the chain anchors at the top of the first pitch and rappel to the base of the climb.
|
Topo of the first pitch of Monkey Business. |
|
The anchors on top of the first pitch of Monkey Business. |
|
Bob and Gordon on the second pitch of Monkey Business. |
|
Rappeling from the top of Monkey Business. The anchors at the top of the third pitch are shown. |

Yurt Monkey is a mixed climb with six bolts. There are a couple of run-out sections requiring gear, but this route has the most bolts in the neighborhood. The six bolts are all 3/8" bolts with Metolius bolt hangers. There are two chain anchors with six chain links each fastened to cold-shuts. The cold-shuts are fixed to the rock with spikes (see the photo below). The overall height of the climb is 73' 4".
There are several errors regarding Yurt Monkey in "Squeezing the lemmon II...". Locations and descriptions concerning Yurt Monkey, Here and Gone and Samson and Dalieback are jumbled.
|
|||||||||||||||||||||||||
|
Front view of Yurt Monkey - with topo. | ||||||||||||||||||||||||
|
View of Yurt Monkey from Here and Gone - with topo. | ||||||||||||||||||||||||
|
Gard on Yurt Monkey. | ||||||||||||||||||||||||

|
The Yurt Monkey anchors. |
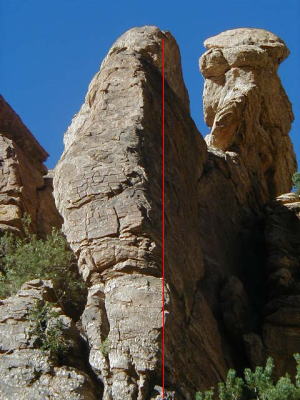
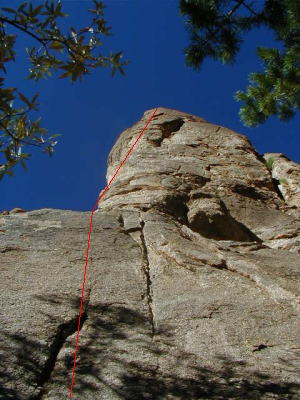
Here and Gone heads up the pillar to the south of Yurt Monkey. There are two main starts to the climb. To keep the route within the grade, work your way up the gully between Here and Gone and Yurt Monkey and then head towards ledge beneath the bolt on Here and Gone (if you are really tall, you can clip the bolt from this ledge). For a harder start, head straight up the slab for the ledge beneath the bolt. This start moves the climb into the 5.9 area.
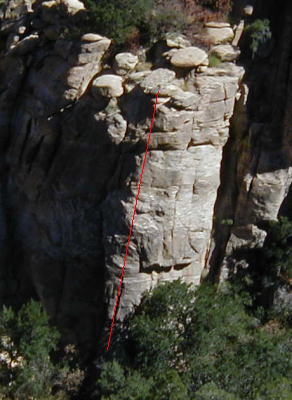
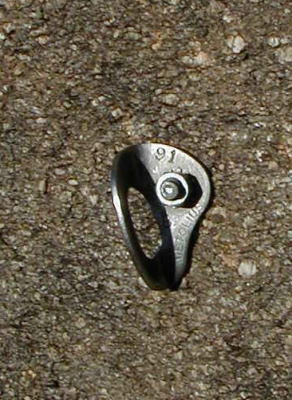
The climb is 91' tall and there is a single SMC bolt on it. There are two SMC bolts at the top that can be used for anchors (see photo below). To get off the climb, the easiest way is to lower or rappel from the anchors on Samson and Dalieback. Note that the top section of the climb has easy climbing but is run-out.
There are a couple of errors regarding Here and Gone in "Squeezing the lemmon II...". Locations and descriptions concerning Yurt Monkey, Here and Gone and Samson and Dalieback are jumbled.
|
||||||||||
|
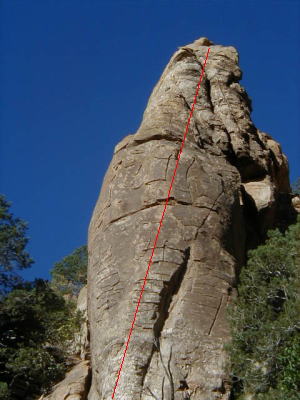
Front view of Here and Gone - with topo. | |||||||||

|
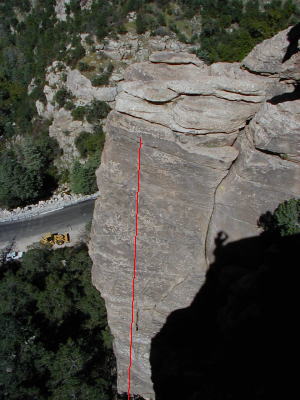
View of Here and Gone from the base of the climb - with topo. | |||||||||
|
Another view of Here and Gone from the base of the climb - with topo. | |||||||||
|
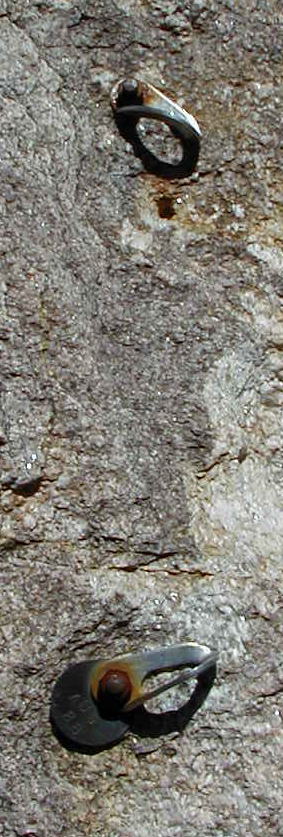
Bolts at the top of Here and Gone. Note the brass tag under one of the bolt hangers with "AUG 88" marked on it. | |||||||||
|
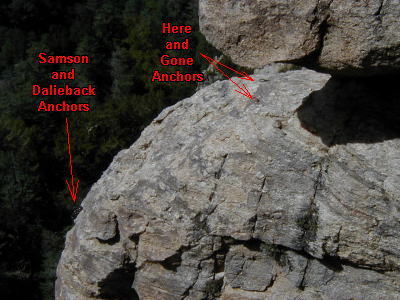
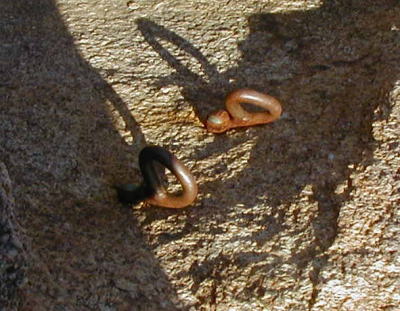
A view of the anchors at the top of Here and Gone and Samson and Dalieback. The anchors for Here and Gone and Samson and Dalieback are labeled. See the description of Samson and Dalieback for another photo of the top of this pillar. |
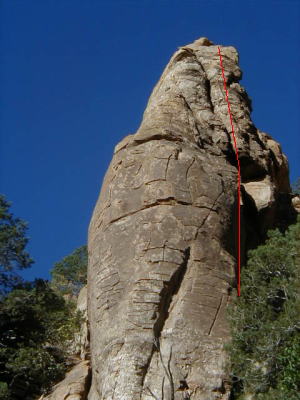
Samson and Dalieback is on the same pillar as Here and Gone and to the right. It has a single 3/8" bolt with a Petzl bolt-hanger and a pair of chain anchors: the left anchor has two links and the right anchor has 4 links. The chains are attached to cold-shuts which are fastened to the rock with spikes (see the photo below).
|
||||||||||
|
Front view of Samson and Dalieback - with topo. | |||||||||
|
View of Samson and Dalieback from the base of the climb - with topo. | |||||||||
|
Side view of Samson and Dalieback from the right - with topo. | |||||||||
|
Chains at the top of Samson and Dalieback. |
David and Goliath is on the same pillar as Rainy Day Woman. It has a three 3/8" bolts and a pair of cold-shuts at the top. All the bolts have SMC hangers. The bottom bolt has a brass tag underneath it with the markings "Nov 88".
|
||||||||||||||||
|
View of David and Goliath - with topo. | |||||||||||||||
|
Another view of David and Goliath. | |||||||||||||||
|
A bolt, bolt hanger, and brass tag on David and Goliath. Ben Burnham used to put brass tags under the bolt hangers with the date. This was before he realized that you could stamp stainless steel (see the photo of the bolt hanger on Jump for Joyce). | |||||||||||||||
|
The David and Goliath anchors. |
Rainy Day Woman is a new climb that is above David and Goliath. It could be categorized as a "one-move wonder" with "the move" being right off the deck. There are two 3/8" bolts on the climb: the first bolt has a Metolius bolt hanger and the second bolt has a Petzl bolt hanger. There are two chain anchors at the top of the climb - each with four links attached to cold-shuts.
|
|||||||||||||
|
A view of Rainy Day Woman - with topo. | ||||||||||||
|
Rainy Day Woman anchors. |

Toy Roof is on the same pillar as Rock Candy and Jump for Joyce. It has a three 3/8" bolts and a pair of chain anchors: each anchor has 11 links attached to quick-links and 3/8" bolts with SMC hangers (see photo below).
|
||||||||||||||||
|
View of Toy Roof - with topo. | |||||||||||||||

|
The Toy Roof anchors. |
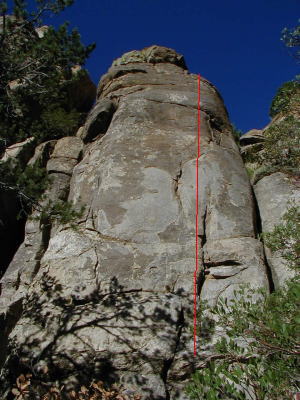
Rock Candy is a gear climb that is between Toy Roof and Jump for Joyce. It 57' 8" tall when measured to the anchors of Toy Roof.
|
View of Rock Candy - with topo. |
Jump for Joyce is on the same pillar as Rock Candy and Toy Roof. Jump for Joyce has two 3/8" bolts with Metolius hangers - the hangers are marked with "B 91" (see photo below). There is a beefy set of cold-shuts at the top of the climb with one of the cold-shuts being slightly cock-eyed (supposedly Ben didn't drill the hole deep enough and when he drove the spike in, it bottomed out and then bent over).
Note that once the second bolt on Jump for Joyce is clipped, things get a little run-out. There is a third Kong-Bonati bolt above and to the right and it may be tempting to clip it, however, the bolt is on Toe Field Day. The climbing around this bolt is in the 5.10 range, not the 5.8 range that might be expected on Jump for Joyce.
|
|||||||||||||
|
Side view of Jump for Joyce - with topo. | ||||||||||||
|
Front view of Jump for Joyce - with topo. | ||||||||||||
|
Bolt on Jump for Joyce. Note the "B" and the "91" stamped into the Metolius bolt-hanger. | ||||||||||||
|
Cold-shuts at the top of Jump for Joyce. |
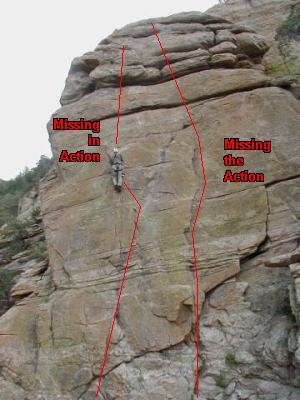
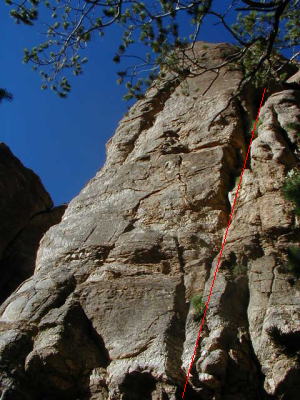
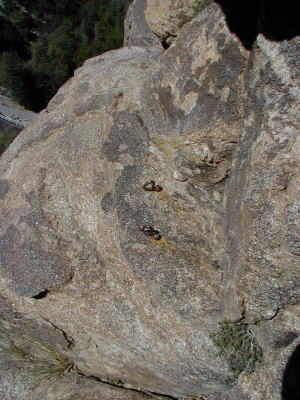
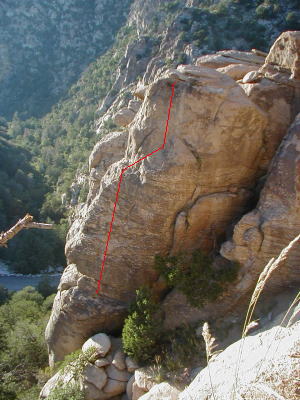
Missing in Action is on the north east side of Green Slabs. It has two 3/8" bolts with Petzl hangers. Traditionally, the climb ascends the face to the block at the top where a gear belay can be set up. It can also be climbed to the anchors at the top of Missing the Action. Click on the photo above to see a topo.
|
|
Another view of Missing in Action - with topo. |
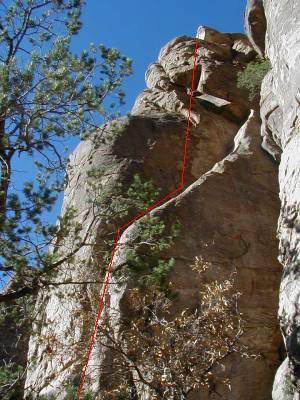
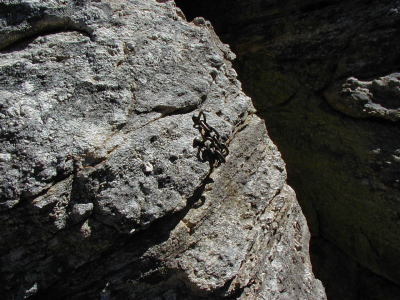
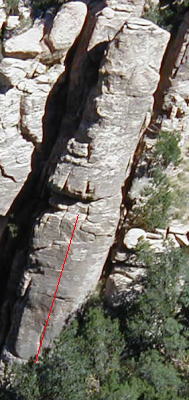
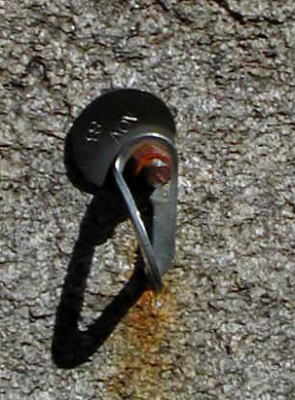
Missing the Action is to the right of Missing in Action. It has an inauspicious start and then heads for a thin crack behind a flake. It is 86' 7" tall and there are no bolts on the climb. There are two chain anchors at the top with four links each attached to cold-shuts. Click on the above photo to see a topo.

|
Another view of Missing the Action - with topo. |
|
Missing the Action anchors. |